The article walks you through an example process of configuring a new Client in the Curator Gateway and deploying it to Curator Clip Link as a custom web app.
Configure new API Client in Curator Gateway
- Add a new client in the Clients tab of Curator Gateway using the green plus icon.
- Set for that client a Display Name and enter the Root URI of the installed client web app.
- Set the Launch Path Template to /{?assetId}.
- Tick the Enabled checkbox.
- Set Grant Types to Implicit.
- Set Allowed API Resources to Curator Gateway API, Process Engine API, Curator Server API. Note: not all of these may be needed for all client applications.

Save the new client. It should appear in the list of clients.

Copy the given Id. You will need to provide this Id to your implementation of the API client for it to be identified in Curator.

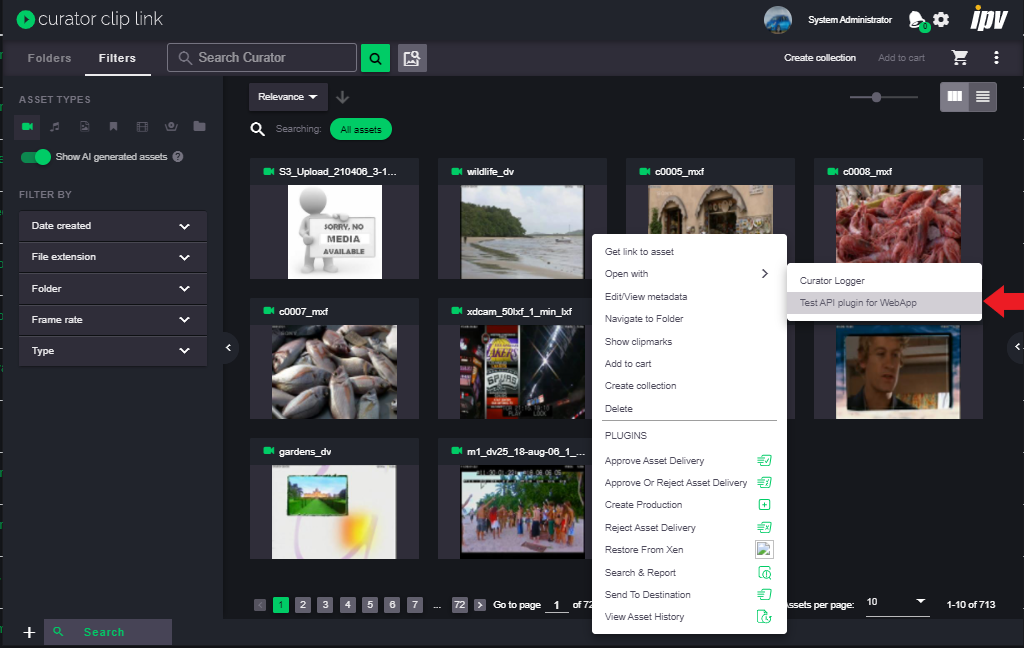
The APITestClient is now available to Curator web apps that have the ability to launch custom web apps, e.g., in Clip Link through the context menus or a right-click on an asset/group of assets.
 An example of a custom web app deployed via Curator Gateway and accessible to (authorized) users in Clip Link
Configure API Client to use Curator API
Within the Client, you need to bind it to the specific Curator Client ID (as provided in the Curator Gateway when the Client was created) and provide Curator Gateway URL which forms the base address for all exposed Curator API calls.
Enter the client Id copied from the Curator Gateway into your client so that is available in the Oidc Client, as illustrated in the API Usage article.
In the provided example, the clientId constant is used:
const clientId = "[enter Id taken from the gateway]"; // The client Id obtained through gateway interface |
Configure the Curator Gateway URL as a base address for the API calls to be used in the calls, as illustrated in the API Usage article (POST section).
In the provided example, the gatewayUrl constant is used, which needs to be set to the gateway address. This will form the base address for the API calls.
const gatewayUrl = 'https://[IIS server]/curatorgateway'; // The base gateway Url |
The API url should later be created by the user, e.g:
|
var apiUrl = "/api/v1/assets/" + assetId + "/metadata/" + metadataField;
var url = gatewayUrl + apiUrl; // Append the api url to the base url so we are asking the right CG instance
|
Process Engine processes can be started, monitored and the returned values obtained using the API.
Process Engine API considerations
Successful use of Process Engine API relies on knowledge of the Process Definition name, Arguments, and configuration MediaStores it can receive.
The example illustrates the use of the API to:
- Obtain a process definition ID from Process Engine. This expects the existence of a process named External - Transfer Assets.
- Create (start) a process using the process definition ID and the form of the argument structure to pass in. One of the arguments is an arbitrary AssetId given in AssetIds, but the AssetId list from the launching of the client could be used. The process should expect an AssetIds text argument and Mediastore text argument. These then can be checked as obtained in the Process Engine Monitor. The returned value is shown on the example Client page
- Monitor a process for its status and possible errors.
Deploy basic Client
An example Curator API Client can easily be deployed in IIS server used for Curator Gateway:
- Create a subfolder in the inetpub/wwwroot to IIS folder (for example, APIClient) in the IIS client.
- Right-click on Default Web Site in the IIS client and select Add Application.
- Enter an Alias for the page (for example, APITestPage) to match the Root URI declared in the gateway and the physical path, (for example, C:\inetpub\wwwroot\APIClient)
- Select Test Settings. The authentication should display as green with pass-through authentication
- Click OK.

